Getting Started with Oppai CLI
This guide explains how to configure Oppai CLI so you can upload game builds to the Oppai.
Oppai CLI is a command-line tool for uploading game builds directly to the Oppai.
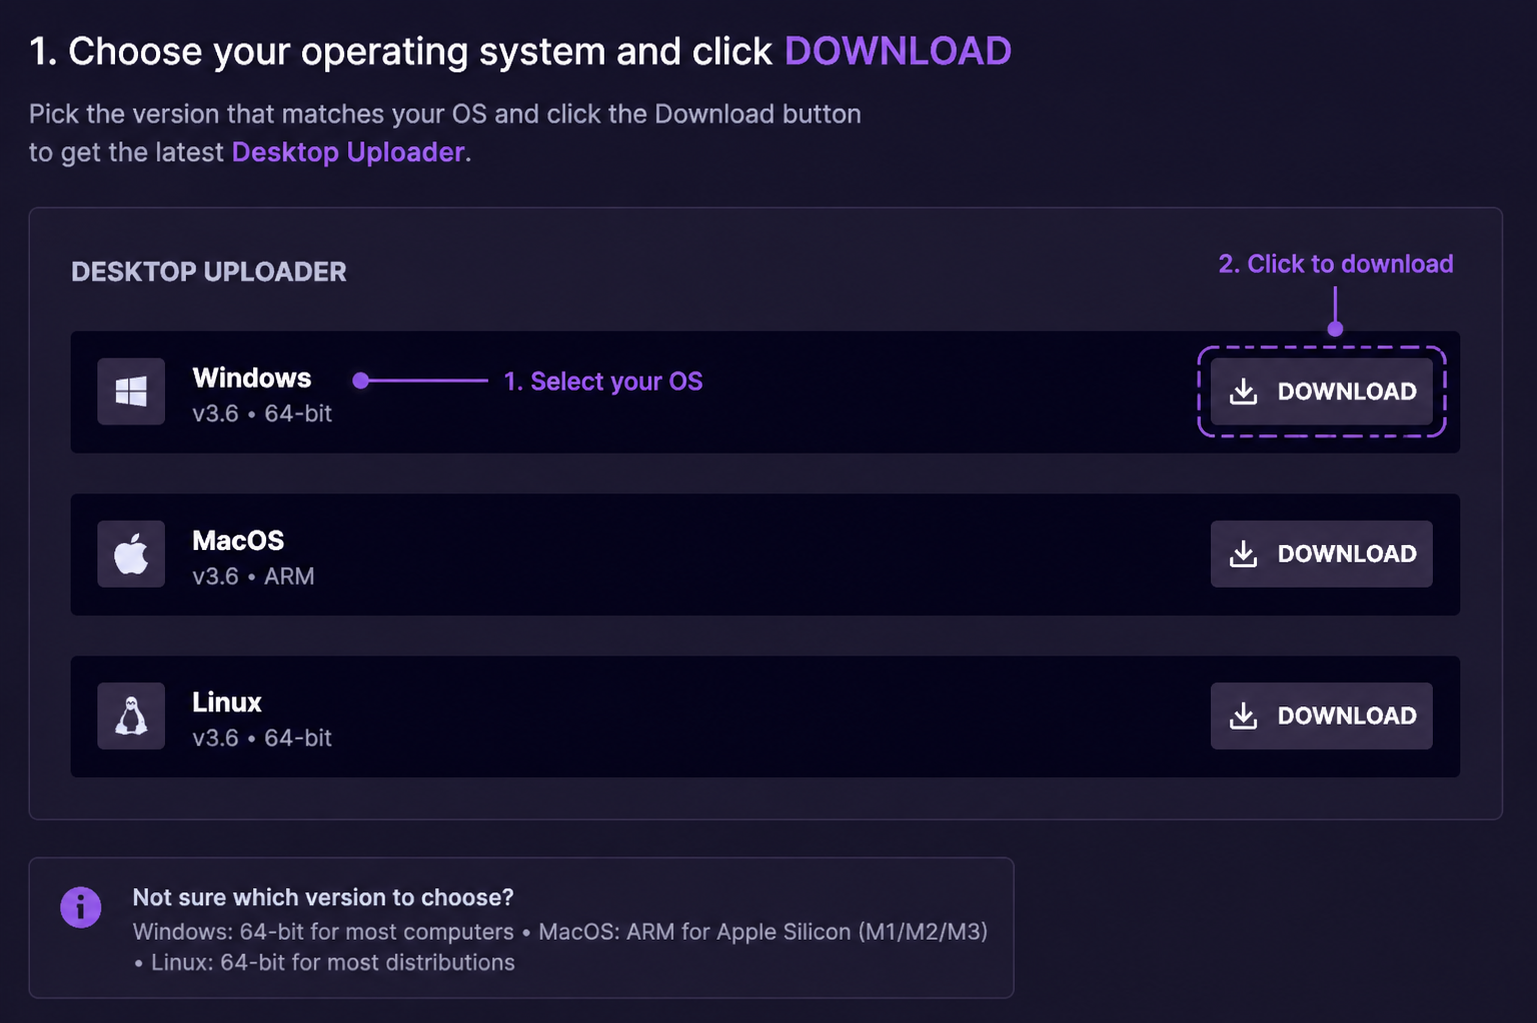
Download Oppai CLI
Download the latest version of Oppai CLI from the Developer Settings page.
Developer Settings
https://www.oppaiman.com/dashboard/settings/?focus=api_keys
You must be logged in to access this page.
Generate an API Key
Oppai CLI requires an API key to authenticate your account and upload builds.
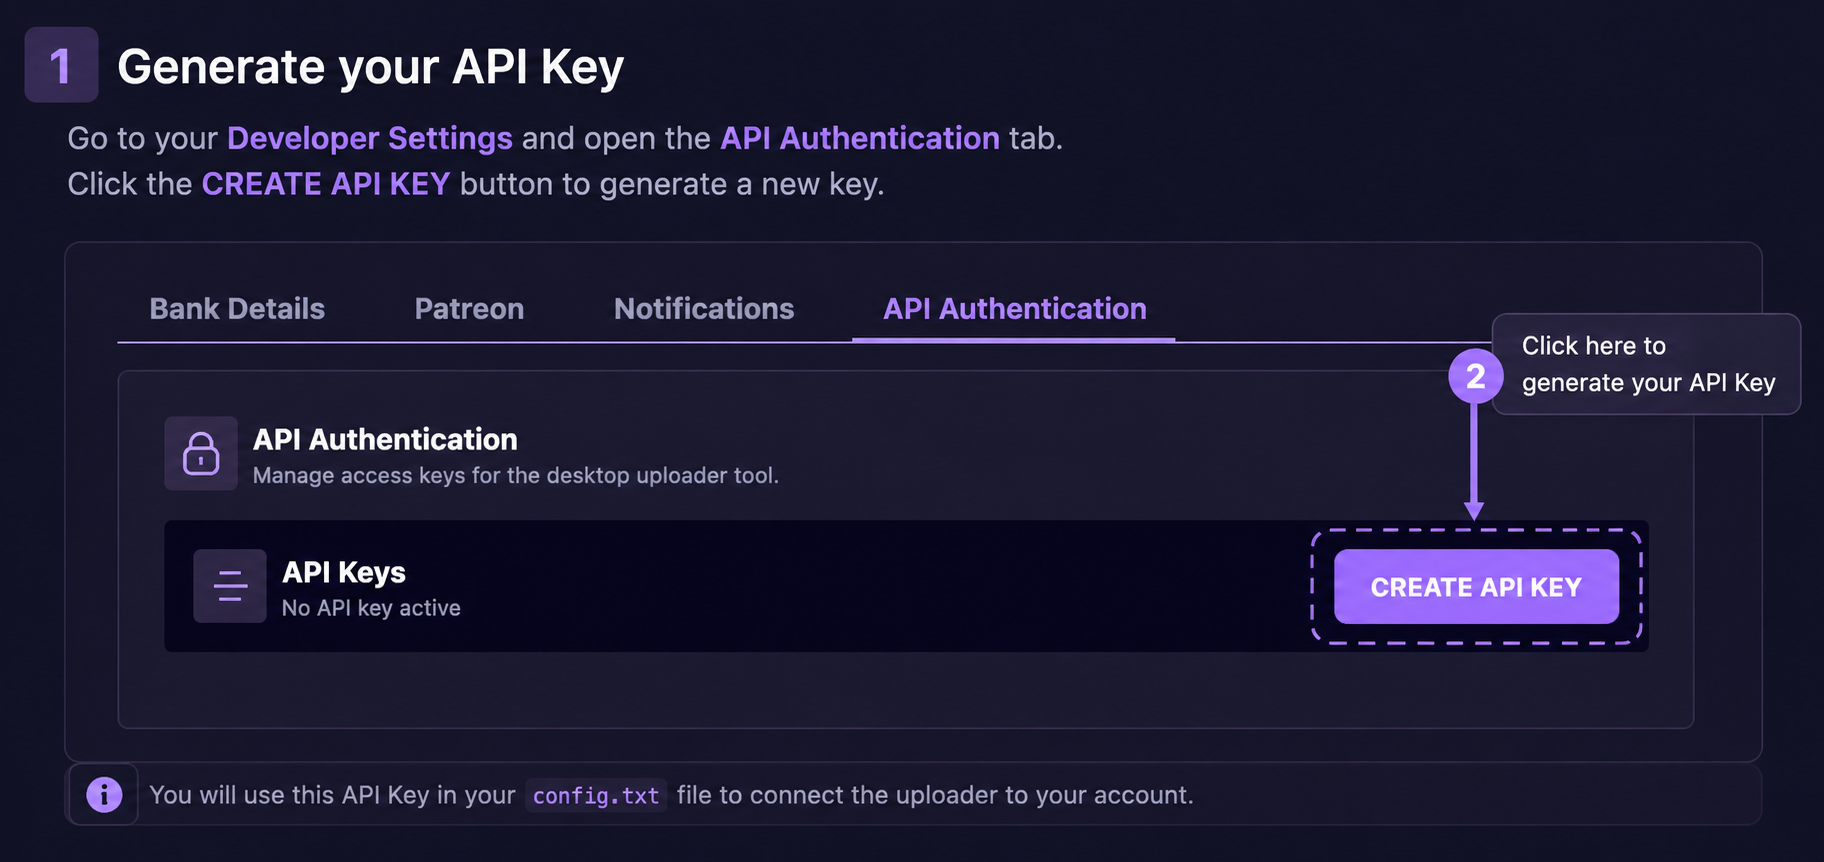
Open the following page:
Developer Settings → API Authentication → API Keys
Step 1: Create a new API key
Click CREATE API KEY.
You may be asked to confirm the action before the API key is created.
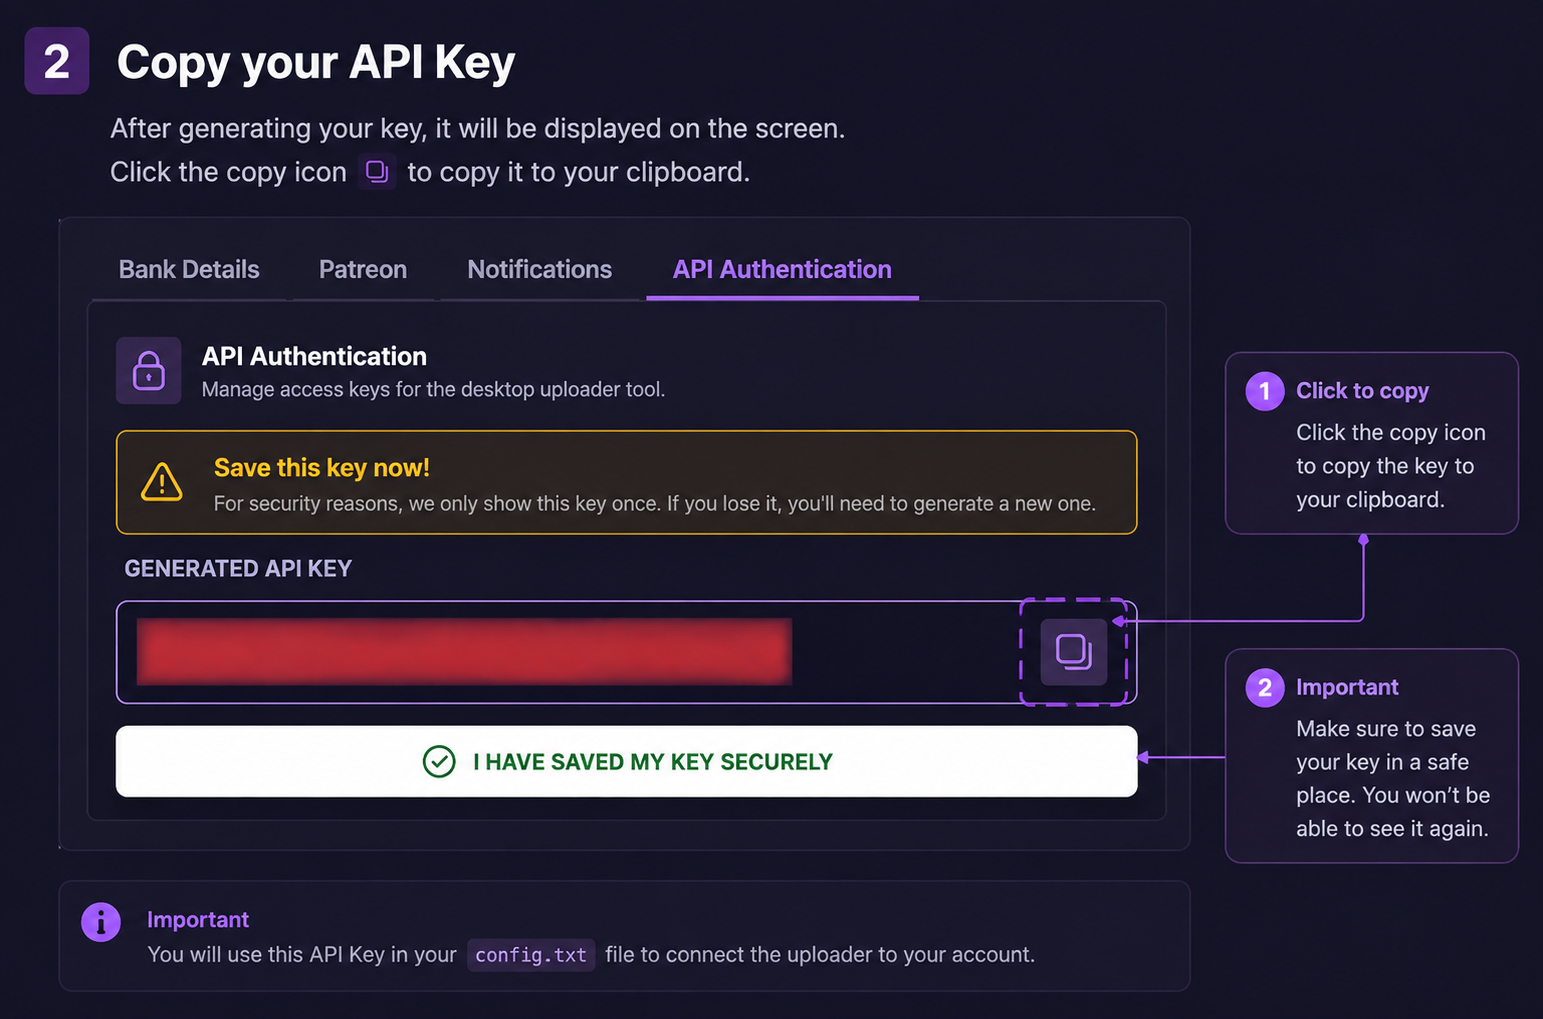
Step 2: Copy the API key
After you create an API key, it is displayed only once. Copy the API key and save it before leaving the page.
Configure Oppai CLI
Step 1: Create the configuration file
Create a file named config.txt in the same folder as the Oppai CLI executable.
Your folder structure should look similar to this:
OppaiCLI/
├── oppai-cli.exe
└── config.txt
Step 2: Add the API key
Open config.txt with any text editor.
Add the following line and replace your_api_key_here with your API key.
DEVELOPER_API_KEY=your_api_key_here
API Key Format
Enter the API key exactly as it was generated.
Do not include:
<or>characters- quotation marks (
") - spaces before or after the API key
Examples:
❌ Incorrect
DEVELOPER_API_KEY=<abc123xyz>
❌ Incorrect
DEVELOPER_API_KEY="abc123xyz"
✅ Correct
DEVELOPER_API_KEY=abc123xyz
Keep your API key private. Do not share it publicly or commit your
config.txtfile to version control.
Your Oppai CLI installation is now configured and ready to upload builds.
Next Steps
Continue with the Upload Tutorials to learn how to upload your game builds.